Monday, May 31, 2010

Home Sweet Internet or Feels Like Sunday

My internet access did not go as planned this weekend. I visited my mom, with my laptop and router. Last visit, I hooked up the router and, voila, wireless internet. No problems. This time – much different story. I gave up and disconnected the router so my mom's PC could surf the internet.

spiral swirl cap

In the meantime, some crafty things happened. Friday night, I finished a hat. This is my still unpublished spiral swirl cap pattern made in medium purple Red Heart Super Saver. Then I started knitting a Vanilla Twist hat, a free pattern from Knitcircus.

Saturday, with multiple Hobby Lobby coupons printed from their website, I coerced my mom into helping with some yarn acquisition. I took our purchases to the car and went back for a second trip through the checkout lines. I netted 4 skeins of Red Heart Super Saver at 40% off. Much more efficient than 1 skein/coupon per trip.

It's not hard to get my mom to help spend Hobby Lobby coupons. She usually finds something she wants to buy. This time it was lawn ornaments that were on clearance, so we used all the coupons on yarn.

After dinner at Outback Steakhouse (I had a coupon), we made a quick stop at Michaels. I got another skein of Red Heart Super Saver, with another 40% off coupon. I found a color that Hobby Lobby didn't have that coordinated with the yarn I got at HL.

fleece blankets with crochet edging

Saturday evening, I started crocheting an edging on some purple fleece with monkeys. Sunday, I told my mom I'd let her drive to my sister's so I could crochet. It was an hour drive each way, during which I finished the edging on the monkeys and started on the soccer print.

This morning, I finished edging the soccer print and knitted a few rounds on the gusset of my current sock project. I headed home to my world and my internet.

It feels like Sunday. The news came on at 10:00 pm and I expected it to be a hour long like Sunday night. My inner clock will probably be off a day all week. Don't you love 3-day weekends?

Thursday, May 27, 2010

Learning EQ7 - Intro

Find a list of all the articles in this series on the Learning EQ7 Series page. The sidebar also has a link to the series page.


If you've read this blog this month, you know that I won a copy of Electric Quilt 7 in the EQ Blog contest. I've had EQ6 for a couple of years, but never spent time to learn how to use most of the features.

I will not let this wonderful gift from Electric Quilt sit on my computer barely used like EQ6. I will learn how to use the software. Not every single feature, but a significant portion.

I will report here on my journey in learning EQ7. Don't expect a specific schedule, but I'll try for something every week. This is a major time commitment, but it is something I want to do for myself and for you, my blog readers.

I have started viewing the EQ7 videos and will continue on to the lessons. I will watch all 10 of the videos. I will do many of the lessons, but will likely skip a couple of things. EQ7 does so much, I doubt anyone will use all of the features.

Wednesday, May 26, 2010

Process & the Frog Pond

Sandi at Piecemeal Quilts wrote about taking the Process Pledge started by r0ssie. I realized that I've been showing a lot of finished projects but haven't wrote much about the process of making them.

I make many quick items and only write about them when they're finished. The hats and the fleece blankets are simple items, so there not that much to say about the process and a lot of it is the same from one hat (or blanket) to the next. But I'm going to work on writing something more interesting than "here's another hat I finished."

Simple Stripes - too long

I brought a Simple Strips quilt kit home from our 3rd Sunday Project Linus group. I had the strips sewn together. Last week I got the giant strip set squared up and cross cut it into 3 pieces. I sewed 2 of the pieces together and finally realized that this monster was 70" long and only about 40" wide. The 5 strips of border fabric won't come close to going around that. And it's on the long and skinny side.

My size rule for throw quilts and security blankets is that the ratio of width to length should be between 1 to 1 and about 2 to 3. So 40" wide should be about 60" long. The narrow borders will add 4" to the width and length. So with borders it would be 44" x 74". The 2 to 3 ratio would be 44" x 66". I don't worry about a couple of inches, but this is 8" off.

The top has been in a timeout for the last week. I waited for the quilt top or my little voice to tell me what to do. I dreaded the prospect of ripping out a 70" seam. Should I leave it be or rip it apart and shorten it?

Simple Stripes - shortened

This morning it was still sitting there. Even though it's a donation quilt from a kit someone else created, I decided it was still sitting because I wouldn't be happy with the size to finish it as is. So while rewatching last night's NCIS and NCIS:Los Angeles season finales, I ripped seams.

I took off 2 of the aqua strips, shortening the strip set to about 63". By adding 4 corner squares from some of the center fabric(s), the border strips are just long enough for this smaller size. Since it's out of the frog pond, hopefully I get it all stitched together soon.

Tuesday, May 25, 2010

152 Blankets

152 blankets moved out of my house today. My faithful car was filled to the brim and we delivered the blankets to Patty, our Kansas City Project Linus coordinator.

136 Project Linus blankets

I received these 136 blankets in April, mostly from the Give a Day, Get a Disney Day program. (See Shifting Focus.) I got the blankets ready to deliver, fixing any problems and attaching the Project Linus blanket label.

Below are 12 blankets I finished in the last month. You've seen several of them on this blog. They are at Patty's now.

12 blankets

I also delivered 3 fleece blankets that my friend Connie crocheted edgings on and a twin size quilt. The quilt top was donated a few months ago. A longarm quilter in one of our Project Linus blanket groups finished it. I'm no longer chapter coordinator,but the quilter sent it back to me so I could see the finished quilt.

My dining room is devoid of blankets. This moves me one small step closer to getting the house ready to sell.

Monday, May 24, 2010

It's Here! It's Here!

Friday, I returned from an afternoon shopping trip to find a small white box on the front porch. UPS had delivered my Electric Quilt 7 software. I was surprised last Tuesday when I received an email saying it was being shipped. I hadn't expected to get EQ7 until near the official June release date. They really meant it when they said the blog contest winners would be among the first to get EQ7.

Front of EQ7 box

Here's the front of the box. The rectangles across the bottom of the keyboard say: "For Beginner Quilters", "For Advanced Quilters", and "For Photo Quilters." In other words, for almost every quilter who has a personal computer.

Back of EQ7 box

The back of the box shows complicated-looking designs that will either scare you away or convince you that you really should go through at least some of the lessons to learn how to do some of that stuff.

EQ7 software CD

Inside the box is the 272 page user manual. In the back of the user manual is the compact disc containing the software and the lessons you can read and learn from.

Flipping through the user manual, I discovered you can export metafiles of blocks and import the metafile in to Microsoft Word to create piecing diagrams. This is a wonderful tool for writing quilt patterns. I went back and checked EQ6 and guess what - it has the same capability. I really handicapped myself by never doing the EQ6 lessons.

Saturday afternoon, I installed the software. The only minor difficulty I had was it took 2 tries to activate the software. The first time I got a message about not being able to contact the EQ server. The second try worked fine, so the first attempt probably fell into an internet black hole.

I looked at the lists of lessons and videos and decided to watch the videos first, then start the lessons.

I plan to write a series of blog posts to document my journey through the EQ7 learning process, so check back to see how I'm doing and what I'm learning.

Sunday, May 23, 2010

Fleece Blanket Roundup

I've finished 5 fleece blankets in the last 9 days, 3 with crocheted edgings and 2 with other finishes.

crochet edging on fleece

This tone on tone yellow/gold fleece edged with a multicolor yarn is one of my favorites. I added one round of solid green between the rounds of variegated for added interest.

crochet edging on fleece

This piece of donated fleece with the pink, lavender and orange circles is why I was happy to get my orange yarn back last Sunday. I kept the edging simple, a foundation of half double crochet and around of single crochet. Some will love this, but orange isn't my color.

crochet edging on fleece

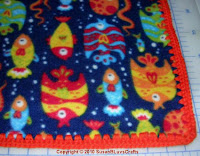
I have quite a bit of this navy fleece with the fish, so time to start turning it into blankets. There were lots of color choices for the edging, but the orange was already out.

looped fringe

This wonderful pink print is more fleece that was donated to Project Linus. I cut a 4" square from each corner and turned under 2" on each side. I stitched the edges down with a zig-zag stitch, then cut loops that are 3/4" wide. The looped fringe is a fun finish.

picket fence fringe

I finished this red fleece with black paw prints with picket fence fringe. I fringed the 2 ends and left the sides straight. For more decorative sides, you can use pinking shears or a wavy rotary cutter blade. The picket fence fringe is cut 2½" long and 1¼" wide and then the end is cut in a point.

I bought lots of fleece the day after Thanksgiving. Between that and fleece that was donated to Project Linus, I've still got fleece for at least 2 dozen blankets. I've also got some smaller pieces to mix and match to make blankets.

Saturday, May 22, 2010

Three More Caps

Over the last 2 weeks, I've made 3 more caps for our AT&T Telecomm Pioneers project for a total of 21 so far this year.

stockinette stitch csp

This first hat was knit from the top down, starting with I-cord and increasing to the full diameter. The variegated yarn is Red Heart Super Saver in the color Watercolor. My goal was to finish the skein of Watercolor, but I still have a small ball left. The brim is knit 2, purl 2 ribbing in Dark Sage Red Heart Super Saver.

Griddle Stitch cap

This hat is crocheted in Griddle Stitch (alternating single and double crochet). I love the texture. The yarn is Red Heart Super Saver in Dark Sage.

Poppy hat

This hat is knit from the pattern Poppy by Justine Turner of Just Jussi. You can see Justine's hat patterns on her website and download the free pdf files.

Poppy is designed as a baby/toddler hat. I used Red Heart Super Saver in medium purple and US size 8 needles (5.0 mm) to create a larger hat. I made a couple of minor modifications including knitting the band in the round, omitting the tab.

The hat was quick to knit and I plan to give it another try since the hat is a bit smaller than I'd like. It's a very stretchy design and stretched to fit on my model, though the hat size is more appropriate for a smaller head.

Friday, May 21, 2010

Knitting Club - May 3rd -Thursday

Ah! Nothing like stitching and chatting with people who like to stitch and chat. My local library has a knitting club that meets the first and third Thursday afternoon of the month. I've been going for a couple of years and was there yesterday. I seldom miss the meetings as I love being with the group.

We're officially "Knits and Stitches", or something like that, on the library calendar. It was just "knitting club" until the beginning of this year. The name change was partly recognition that we regularly had crocheting in the group and occasionally quilting or embroidery. And partly because they combined the Monday evening quilt group with our group. Or tried to. Most of the Monday evening quilters aren't able to come in the afternoon.

So what are people working on? Here's a small sample. Warning: flash photography under fluorescent lights so colors are not the most accurate.

orange knit dishcloth

Bonnie was knitting a dishcloth using the classic diagonal garter stitch pattern. This weeks' dishcloth in progress is orange. The yarn is cotton; probably Sugar and Creme.

eyelash yarn scarf

Donna, a library staff person assigned to us, has been working on this peachy scarf for weeks. The eyelash yarn makes it look fancy, but it's a simple knit. She only works on it when our group is meeting.

Knit Ruana - back and front Knit Ruana - front half

Terri has been working on her Knit Ruana for ages and was down to the last 3 rows. It's knitted cuff to cuff, all in garter stitch with the ridges running vertically. Terri tied the center front together temporarily so the 2 fronts didn't go in opposite directions as she knitted.

The pattern is "Knit Ruana" by Annie Dempsey. Publisher is Oat Couture in Jacksonville, Oregon (©2005). It's one size with instructions for worsted, chunky or super bulky weight yarn. The pattern is available at Patternfish.

Knit Ruana - front detail

This photo shows the front detail on the ruana. Remember, Terri tied the fronts together temporarily so it was easier to work on. The pattern shows one side of the front overlapping the other with a decorative pin to hold it in place.

Knit Ruana - cuff

This is the corner of the front and the cuff at the cast-on edge of the ruana. Terri used Red Heart Fleck yarn in a dark wine color. This photo is closest to the actual color.

knitted sparrows nest

Cathy was finishing a pair of socks, but it was her show and tell that was the hit of the day. Cathy made this nest of blue eggs for Kathy's grandson. (Yes, we have 2 C/Kathy's in the group and they are neighbors.) The pattern is Sparrow's Nest from The Purl Bee.

Wednesday, May 19, 2010

Knitting E-Magazines

I discovered a new e-magazine today, Knitcircus. Knitcircus publishes articles and pattern photos and information online for free. The current issue has interviews with Cookie A and Wendy D. Johnson.

Knitcircus patterns are offered for purchase separately with electronic delivery. You may buy either the patterns from the current issue or subscribe to the magazine on a yearly basis (4 issues per year). Sign up for the free monthly Knitcircus newsletter for reviews and more.

Knitty has been online since the fall of 2002 with 4 issues a year. All content, including patterns, is free to the reader. Each issue is packed with interesting patterns. Content from past issues is archived and available on the website. Join the knittyreader list and get an email when new content is posted on the website.

Tuesday, May 18, 2010

Project Linus - Third Sunday Group - May

Jodie assumed leadership of our 3rd Sunday Project Linus group last fall. She picks a different quilt design each month and makes kits from a combination of donated fabric and fabric she buys. Some of us arrived with blankets we finished since our last meeting.

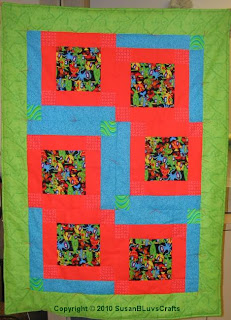
Last month's quilt kit featured an asymmetrical block that Jodie dubbed the Wonky Block. Her block layout left some feeling a little wonky.

Wonky Block quilt

Debby modified the block layout in her Wonky Block quilt. The 2 blocks in the middle row are rotated half a turn (180 degrees) from Jodie's design.

Wonky Block quilt

Sandy reversed the 2 columns on this Wonky Block quilt so the blue fabrics meet in the center.

Not Wonky quilt

The lop-sidedness of the Wonky Blocks bothered Sandy, so she de-wonked this Wonky Block kit. Instead of adding the green strips on 2 sides of each block, she used them as sashing and added another border fabric so it's all nice and symmetrical.

patriotic Happy Block quilt top

Our March quilt design was the Happy Block (aka, H-Block). Sandy turned in this finished Happy Block quilt in patriotic fabrics.

Yellow Brick Road quilt top

A bag of fat quarters was donated to Project Linus. Sandy turned some of them into this Yellow Brick Road quilt top.

fleece blanket with crochet edging2 pieces of fleece joined with crochet

This fleece blanket, made by crocheting around pieces of fleece and then joining them like crochet squares, was made by Sandy.

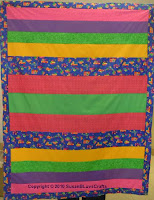
Our May quilt project is called "Simple Strips." There are 3 variations. We all arranged our strips more or less symmetrically and had most of our strips sewn together. Then we realized the symmetry made 2 of the variations poor choices. So we all stitched the simplest version of "Simple Strips." Jodie had some really great fabric combinations in the kits, so simple is still stunning.

Simple Strips quilt top - Jodie

Jodie's Simple Strips quilt top. Jodie went for the racing fabrics with the bright orange.

Simple Strips quilt top - Sandy

Sandy chose a Simple Strips kit with little toy cars and trucks and lots of tone on tone fabrics.

Simple Strips quilt top - SusanB

I chose a kit with 2 coordinating floral fabrics and a bunch of tone on tone fabrics. The lime green adds some zing.

Simple Strips quilt top - Anita

Anita chose a kit with colorful octopuses (octopi?).

Vickie and Judy tied 6 quilts. With the finished blankets Sandy, Debby and I turned in, there were 16 new blankets from our group. Judy took the last quilt home to tie. Jodie will get some more tops ready to tie for our meeting next month.

Sunday, May 16, 2010

Yarn Comes Home

yarn

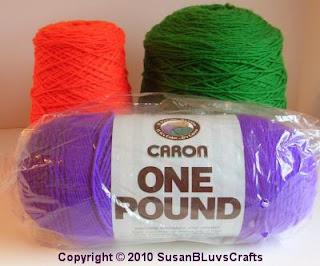
My friend, Sandy, gave me a little present at our 3rd Sunday Project Linus blanket group meeting this afternoon: some of the yarn I had "loaned" her to crochet edgings on fleece blankets. The pound of purple is unused. The cone of orange and the cone of green each started with about 2 pounds of yarn.

At one time, I had 2 of the purple Caron pound skeins and a cone of purple. A couple of weeks ago, I realized that I had yards of 2 different purple fleece prints and no purple yarn. I mentioned this at knitting club a week and a half ago, the same day Connie returned the unused portion of the the skein I'd "loaned" her. A small ball about 2 inches in diameter!

So Sandy brought some of the yarn I'd loaned her. She still has the cone of purple. I am glad to have the orange back. I have a piece of fleece with a 60s/70s style print in pinks and oranges and nothing matches the pink. I'm not fond of orange, so I'm glad to see that the cone shrunk a lot while Sandy had it.

I have lots of pictures of quilts and quilt tops from our Project Linus blanket group this afternoon. Look for some quilt pictures soon.

Saturday, May 15, 2010

And the EQ7 Winner Is:

Beth from San Diego, California. Her winning comment was:

Beth said...

I had a great time designing a Storm at Sea quilt on EQ5 - it was great to have the fabric and piece lists. Would love to be able to move up to EQ7!

I've exchanged email with Beth and have her address to send to The Electric Quilt Company, along with my address, so we both will get our Electric Quilt 7 software.

Thanks to The Electric Quilt Company for choosing me as one of the lucky winners in their blog contest so I could give away a copy of Electric Quilt 7.

Thank you to all who commented and left reasons why you'd like to win EQ7. There were entries from the United States, Canada, United Kingdom, France, Germany, Australia and Taiwan. And that's just what I could tell from the comments and email messages.

Those who entered included many who own a version of EQ and some who don't. Some are interested in the new features, some wanted to win for a friend or family member. You use or want to use Electric Quilt for a variety of reasons. To make designing easier. To design quilts for friends, family and charity and in a couple of cases (semi-)professionally.

For those who didn't win, remember that you can still pre-order EQ7 on the Electric Quilt website. There is a significant discount on orders placed before May 31, 2010.

The contest increased my blog readership significantly in the last week and a half. I hope some of you are interested in what I'm sharing here and keep coming back to visit.

Friday, May 14, 2010

Whirlygig Quilt - Finished Prototype

Whirlygig quilt

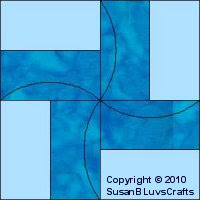
This quilt design was inspired by a quilt made in one of our Project Linus blanket groups. The block reminded me of a windmill or one of those little pinwheel / whirlygig toys on a stick. I couldn't find a name for the block and whirlygig is a fun name.

Whirlygig was my chapter's National Make a Blanket Day project on February 20. I made this top, with 8 inch blocks, as a prototype. I decided it was too much work/time for our Project Linus event. I changed to 10 inch blocks and used Electric Quilt 6 to help decide the number of blocks and border width.

Whirlygig quilt - closeup

I finished quilting the prototype yesterday. I quilted the ditches between all of the blocks, then quilted a curvy line through the center, both horizontally and vertically.

whirlygig quilt block - quilting detail

The closeup photo doesn't show the quilting well, so here's a sketch from EQ showing the curved quilting lines. The curved line gives a sense of the blades catching the wind and spinning.

Thursday, May 13, 2010

Last Day, Enter to Win EQ7

Electric Quilt 7

Don't forget, you have until 11:59 pm Central Daylight Time on Friday May 14, to enter my contest to win Electric Quilt 7. To enter, you must go to the post called Win Electric Quilt 7 and follow the instructions there.

If you need to convert May 14, 11:59 p.m. CDT to your local time, try the Time Zone Converter. Select America/Chicago for the 'From Time Zone.'

Wednesday, May 12, 2010

Quick, Cuddly Blanket

crocheted edging on fleece

There are many ways to make a fleece blanket, but adding a crocheted edging is my favorite. This blanket for Project Linus is about 36" by 55". The soft purple fleece is edged with 3 rounds of crochet. The first and last rounds are groups of 2 half double crochets. The middle round is one single crochet and one chain, repeated around. The variagated yarn is the color Monet in Red Heart Super Saver. The yellow was donated without a label.

crochet edging on fleece

I cut holes to crochet into with a wonderful specialty rotary cutter blade called a skip-stitch blade. You have to have rotary cutting tools, but as a quilter, I'm well equipped with rotary cutting tools.

You can order the skip-stitch blade from the manufacturer at skipstitch.com or from the Project Linus store. There are 3 varieties of skip-stitch blades. Read the descriptions and choose the one for fleece.

I learned how to add an edging to fleece from this YouTube video created by one of the Chicago area Project Linus chapters.

There is also a Project Ideas page on the Skip-Stitch website. Be sure to click on the link under the video for written step-by-step instructions.

August 9, 2012 Update - The Skip-Stitch website has changed. A big Thank You to Karen C. for the heads up on the broken link. The video is now on the Skip-Stitch home page. Their Ideas page has a slide show and written directions for using the skip-stitch blade.

February 18, 2024 Update - The Skip-Stitch website has changed, probably multiple times. I cannot find a video on the Skip-Stitch site. There is a page of instructions.

The Skip-Stitch site suggests a foundation of single crochet and chain 1 in each hole, with extra single crochet in the corners. I usually do 2 half double crochet in each hole (4 in the corners). You need 2 stitches for each hole, with extra in the corners, in the first round. What you do depends on the look you want and the edging you plan after the foundation.

Tuesday, May 11, 2010

Berry Cobbler, Anyone?

Chamelion Colorworks yarn - Footsies berry cobbler

Doesn't this hank of yarn look good enough to eat? It is a hank of Footsie yarn from Chamelion Colorworks that I bought at their booth at the New Mexico Fiber Arts Fiesta last May. The color name is Berry Cobbler and it looks yummy.

With help from a friend, the hank turned into 2 balls on April 15 and those 2 balls are becoming a pair of socks. I'm starting the gusset increases.

toes and insteps of a pair of socks

The pattern is Hermione's Everyday Socks by Erica Lueder. It is also available a free Ravelry download. Yes, Hermione's Everyday Socks is a cuff down patten and I'm knitting toe-up. That's a wonderful thing about the stitch pattern – it looks the same knitted toe-up as it does cuff down. I'm also working at a tighter gauge with more stitches, but the end result will look the same.

Monday, May 10, 2010

Ribbed Cap

ribbed cap

I still make donation hats for our AT&T Telecomm Pioneers project, though I've not blogged about making hats (or much of anything else) since 2008. The hats go to City Union Mission in downtown Kansas City in early December. I finished this hat this morning. It is the 18th donation hat I've completed this year.

The pattern is my Teen/Adult Ribbed Cap pattern. The yarn is Red Heart Super Saver. The main color is Pale Plum. The solid green is Lt. Sage and the variegated is Watercolor. The photo was taken on a rainy evening with flash and indoor lighting, so the colors are not accurate.

Friday, May 07, 2010

Wacky Rail Fence - Free Quilt Pattern

Wacky Rail Fence quilt

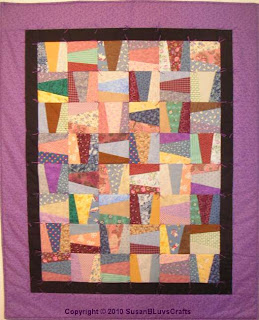
I added the Wacky Rail Fence quilt pattern to my website since last October, but never announced it here. It's a great way to use scrap fabric. My friend, Jeanine, taught this block in our old Quilts from Cornerstone group. I changed the dimensions a little and wrote my own directions. The picture above was drawn in Electric Quilt 6.

The quilt below was made by someone in one of our Project Linus blanket groups. I shared the pattern with my Project Linus volunteers last October and some were really excited about it.

Wacky Rail Fence quilt

If order your stacks of blocks in the same order you stacked the fabrics to cut them (based on the center fabric in each block), you can create an nifty secondary pattern. Turn the blocks with the cuts going up and down and then turn every other block 90 degrees. You get a wonky H that repeats a couple of times in each row, like in the drawing at the top of this post. Or you can mix everything up like the quilt above.

Now that I have more time to work on my own projects, I'm looking forward to making a Wacky Rail Fence quilt. I've got a stack of rectangles cut. All I have to do is find them.

Thursday, May 06, 2010

Win Electric Quilt 7

Electric Quilt 7

You've been waiting impatiently for my Electric Quilt 7 give away contest announcement. This is it.

Thank you to the Electric Quilt Company for choosing me to give away a copy of the EQ7 program on my blog and to receive a copy myself.

How to enter to win a copy of EQ7:

  1. Make a comment on this blog article telling me why you want to win EQ7. Do you design quilts as part of a business, for charity or just for you, your friends and family?
    • No anonymous comments. If you do not have a Google account or an OpenID, please use the Name/URL identity option. The URL can be left blank.
    • You may use a nickname or screen name instead of your full name in your comment.
  2. Send an email to complete your entry. Send the email to sb@handcraftingwithlove.net with the subject "HCWL EQ7 contest." Include enough information to match the email with your blog comment. The email will ensure that I can contact the winner.
  3. One entry per person.
  4. Entries will be accepted until Friday, May 14 at 11:59 pm Central Daylight Time.

A random number generator will be used to pick the winner.

The Electric Quilt 7 software program will be shipped directly to the winner by the Electric Quilt Company. The winner must provide full name, shipping address, phone number and email to receive the product. The Electric Quilt 7 release date is in June and the prize will not be shipped until then.

May 15, 2010 UPDATE - Comments and entries are closed.

Wednesday, May 05, 2010

A Cinco de Mayo Finish

coral and white afghan

I started this afghan last year in the spring or summer. I completed the center stripe and the afghan languished with little or no progress each month. Since resigning as Project Linus Coordinator, this is one of the things I've been inspired to resume working on. I finished it today on Cinco de Mayo.

coral and white afghan

The coral yarn was reclaimed from an unfinished afghan. The pattern stitch is a half double crochet alternating with a chain 1. The hdc is made in the chain spaces. This is similar to the original design.

The afghan was a bit small, so I added the white stripes and edging to make it a more useful size. The finished afghan is 37.5" by 44" and used about 18 ounces of coral and 8 ounces of white yarn.