
This crocheted summer bolero shrug is what I was designing last week. I had to be a bit secretive as my family reads this blog and the shrug was a birthday present for my stepsister, Sharon.

I used Lion Brand Microspun, a DK weight yarn, in royal blue and a size I crochet hook. The pattern stitch is (sc, ch 3, dc) worked in the same space. The edging round the neck, front and lower edges is 2 rows of single crochet separated by 1 chain stitch. The second row of edging works the single crochet in the chain 1 space of the first row.
The Design Process
The design process started with shopping for yarn on Monday. I bought as many skeins in the same dye lot as they had and hoped it was enough. They only had 4 skeins in the same dye lot, so I was crossing my fingers. Until I had most of the shrug crocheted, I wasn't sure 4 skeins would be enough.
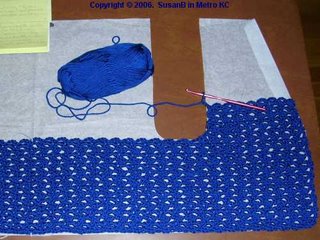
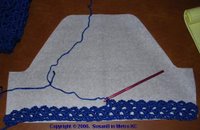
Next it was time to sit down and make some test swatches. This was needed to choose a pattern stitch and to determine my gauge so I knew how many to chain to start the shrug. I made a small sketch of the shrug with dimensions noted. Then I created a full size pattern with tissue paper.
Working the straight sections was easy. I just needed to lay the crochet flat periodically to check the length, so I knew when to start shaping. Shaping the underarm area, upper front and the top of the sleeves was interesting. The challenge was to maintain the pattern stitch while gradually decreasing the width.

The entire time I worked on the front sections, I sat at a table and laid the body of the shrug on the pattern every row or two to check the shaping. My yellow legal pad was close by to record every stitch I made. I have 8 pages of notes on how I crocheted this shrug, plus my sketches.

I finished the back on Friday morning and started the first sleeve before driving to my mom's for the weekend. The shaping on the sleeves was a different angle than the shaping of the fronts. A 3 row repeat for the decrease versus an 8 row repeat. The sleeves are smaller, so I was able to sit in a comfortable chair with the sleeve pattern laying on an ottoman. I just had to keep the fans from blowing the pattern away.
Saturday morning, I finished the second sleeve and started weaving in yarn ends and sewing seams. And weaving in more yarn ends. I was sewing the 2nd sleeve into the armhole when the family started arriving for the birthday celebration. I quickly pulled out my needle and stuffed the shrug into a gift bag. I presented the gift, then took it back to finish it. (Quilters do this all the time, so I sure it's OK for crocheted gifts also.)
I finished sewing the 2nd sleeve in and wove in more yarn ends. I don't know where all those yarn ends came from. There were only 4 skeins of yarn! Then I did the edging. The neck/front/bottom edge needed the support, but I decided to leave a softer edge on the sleeves, so there is no edging on the sleeves.
At some point, I will transcribe my 8 pages of notes and put the pattern on my website. I don't know just when as there are several things I've been meaning to write up and put on my website and I haven't got any of them done.
What a beautiful shrug! I am sure your sister will love it. Thank you for sharing.
ReplyDeleteSusan..that is beautiful and I would love to have the pattern for it. I have been looking for an easy shrug to make for myself. I hope your sister liked it, she should have. My email is brgh1@comcast.net if you can email me the pattern or tell me where I can get it myself? I would appreciate it.
ReplyDeleteBarbara
Barbara,
ReplyDeleteThe pattern is 8 pages of handwritten notes on a yellow legal pad. Your guess is as good as mine regarding when I'll get the design typed up. I think I've added one pattern to my web site in the last 2 to 4 years and I've got 5 or 6 designs older than the shrug that have been waiting to be on my website. I've got good intentions, but I'm easily distracted.
SusanB
Good job, Susan. It's beautiful!
ReplyDelete