Showing posts with label Electric Quilt. Show all posts

Wednesday, June 30, 2010

Learning EQ7 - Part 5

Find a list of all the articles in this series on the Learning EQ7 Series page. The sidebar also has a link to the series page.


Video 9 - Print the Lessons

Duration: 1 minute, 21 seconds

The videos are the first step in learning EQ7.

Halfway down the help menu you'll see "EQ7 lessons (PDFs)." Click on that item and a list of the 22 lessons is displayed in a new window. Adobe Acrobat Reader is required to view and print the lessons.

The lessons are easy and short so they are fun to work through. Though targeted at new users, even experienced EQ users will learn from the lessons.

The lessons are divided into 6 categories:

  • Quilts – 6 lessons
  • EasyDraw™ Blocks – 6 lessons
  • Images – 2 lessons
  • Pieced PatchDraw Blocks - 2 lessons
  • Printing – 3 lessons
  • Appliqué PatchDraw Blocks – 3 lessons

Quilts - Lesson 1 - Plain Horizontal Quilt

This lesson is 6 pages long. I spent about 15 to 20 minutes doing it. You can spend more time or less, depending on your experience level and what you want to do.

The list of topics covered in Lesson 1 are:

  • Creating a New Project
  • Starting a Horizontal Quilt
  • Learning How Layout Controls Work
  • Coloring the Plain Horizontal Quilt
  • Understanding the Sketchbook
  • Modifying the Quilt

This lesson is arranged in 2 columns. The right column contains a numbered sequence of steps, describing exactly what to do. The left column contains pictures to illustrate what you should be clicking on or doing in each step. I think all the lessons are arranged like this, but I've only looked at a couple so far.

In this lesson, you create a simple quilt with squares of fabric set together in horizontal rows with sashing. The quilt layout controls are introduced. The CTRL and ALT keys are used to color every square or alternate squares. This also works on the sashing pieces.

This was a very quick and easy lesson. I knew most of this from my limited use of EQ6.

quilt design from EQ7 lesson 1

This is the last design I created in this lesson. I dislike orange, but I'd colored the blocks blue and yellow and the orange went with that.

Tuesday, June 22, 2010

Learning EQ7 - Part 4

Find a list of all the articles in this series on the Learning EQ7 Series page. The sidebar also has a link to the series page.


Video 7 - Working on a Project and Printing

Duration: 4 minutes, 43 seconds

This video started with a review of previous lessons. The following design capabilities were introduced.

  1. The Swap All Colors tool changes one color (fabric) to another all over your quilt design. For example, click a pale orange on the color/fabric palette then click a yellow patch on the quilt. All the yellow patches are now colored pale orange.
  2. When using the Set Block tool, if you hold the ALT key when you click on the quilt, the block will be set into every other space on the quilt.

Remember to click the 'Add to Sketchbook' button to save your design when you are done designing.

To print your quilt, click the 'Print' button and choose 'Quilt.' A window appears that displays the quilt, quilt name and printing options. Quilt names and project names are different. Video 5 showed how to name a quilt in the Sketchbook.

You can preview the printout before printing. You can also print the fabric yardage for your design.

Before printing a pattern, you have to select the part of the quilt you want to print a pattern for. Click the 'Select' tool (the arrow) at the top of the toolbar in the right column and then click on a block. A frame appears around the block to show it is selected.

Click on the 'Print' button and there are now options to print the Block, Foundation Pattern, Templates or Rotary Cutting instructions.

Video 8 - What If I Just Want a Pattern?

Duration: 3 minutes, 38 seconds

You don’t have to design a quilt to print a pattern. You don’t have to create a project or open an existing project. Instead, go to the block library and add the block you want to the Sketchbook.

Close the Block Library and open the Sketchbook. Click on the block in the Sketchbook and click the Edit button to open the block in the block worktable. Click the 'Print' button and you have options to print the Block, Foundation Pattern, Templates or Rotary Cutting instructions.

Type the size you want to make your block and click preview. If you are printing templates, you can rotate and move the individual pieces. If you can move everything so it fits on fewer pages, the blank page won’t print.


I'll talk about Video 9, Print the Lessons, in Part 5. Continuing to the 10th and last video . . .


Video 10 - Find Help Yourself!

Duration: 3 minutes, 8 seconds Video 10 introduces some of the ways to get help in EQ7. To get started, click 'Help' on the top menu bar and check out the options. This is where you go when you want one of the lessons provided in EQ7.

Also under 'Help' is "How Do I?" with How to's on Blocks, Quilts, Images, Printing and General topics. Inside each section are step-by-step instructions for things they think we may want to do. You can print each topic, if you like.

The dialogue windows that pop up for various tasks have a help button in the lower right corner. Click on that button and you'll go straight to the help page for what you are doing.

On the top toolbar, the button with the question mark turns Dynamic Help on and off. Click to turn Dynamic Help on and then hover the mouse pointer over any button. Information about what that button does will be displayed. Click the button with the question mark again to turn Dynamic Help off.

Tuesday, June 15, 2010

Learning EQ7 - Part 3

I created a Learning EQ7 Series page to make it easy to find all of the articles in this series. There is a link to the page in the sidebar.

Adding Fabrics in EQ7

I want to thank Sandi at Piecemeal Quilts for her wonderfully detailed comment on Learning EQ7 - Part 2. She provides links to several sources for fabric palettes you can add to EQ and links to instructions for importing JPG fabric images.

Judy Laquidaria at Patchwork Times wrote about Importing Fabrics into EQ7 today. She took a photo of fabrics she planned to use in a quilt and imported them to use in her quilt design.

Video 5 - Naming a Project Before Designing

Duration: 6 minutes, 23 seconds

To make your project easy to find, name your project, then start designing. When you start EQ, a window displays prompting to type a project name to start a new project.

Everything you add to your sketchbook will be saved automatically with your project. When you exit EQ, you don’t have to save first. Everything in your sketchbook is already saved.

To continue working on a design when you start EQ again, click the "Open an existing project" tab and select the project you want to work on. To put a quilt back on the worktable, you select it in the Sketchbook and click on Edit. When viewing a quilt in the Sketchbook, click the Notecard button to name the quilt design.

This video introduced some capabilities used in setting blocks in your quilt.

  1. When using the Set Block tool, if you hold the CTRL key when you click on the quilt, the block will be set into all the spaces on the quilt.
  2. The Erase Block and Symmetry tools were demonstrated. The Symmetry tool flips and rotates all the blocks to create 16 different designs.

Video 6 - Opening a Project

Duration: 4 minutes, 22 seconds

When you start EQ, close the "Tip of the Day" window. On the next window, click the "Open an existing project" tab and select the project you want to work on. The project sketchbook will open. Click the quilt you want to work on and click edit to put the quilt on the worktable.

Make changes to the design and click the "add to sketchbook" button. When you look at the sketchbook, you will see the original design before editing and your new design that you just added.

To make a new quilt in a different style, (e.g., with the blocks on point instead of horizontal), click Quilt –> New Quilt and choose a style.

Click the layout tab under the quilt to adjust the number and size of blocks. Return to the Layer 1 tab to set blocks and work on your design.

To change projects, click File –> New and the window to create or select a project is displayed.


These 2 videos covered more than just creating a new project and opening an existing project. They also revealed some of the basic quilt design tools and how to use them.

Each video contains some review of what was covered in the previous video to help reinforce key points. If you watch 2 or 3 videos in a row, it's a bit redundant, but a good refresher if you come back at a later time.

Tuesday, June 08, 2010

Learning EQ7 - Part 2

Find a list of all the articles in this series on the Learning EQ7 Series page. The sidebar also has a link to the series page.


Video 3 - How to Use the Libraries

Duration: 4 minutes, 18 seconds

Open a library by choosing it from the Libraries menu on the top menu bar. This opens a window where you view the library contents.

Categories are listed in a column on the left and you scroll up and down through the categories. Expand a category to display the styles it contains by clicking the plus (+) sign next to the name. For example, a few styles in the category Contemporary Pieced Blocks are: Fans, Houses, and Kaleidoscopes.

Items from one style at a time are displayed and there is a horizontal scroll bar to scroll through the items in the style. The name of the current category and style are displayed at the top right of the window.

To use an item in a design, you click on it and then click "Add to Sketchbook" to take it out of the library and put it in the sketchbook.

Video 4 - Using the Project Sketchbook

Duration: 5 minutes, 54 seconds

Once you have added design elements to the sketchbook, you can use them in your quilt designs. To add blocks to your quilt, first close the sketchbook.

In "work on quilt" mode, click the "Set Block" button on the right column. A window with the blocks in your sketchbook appears. Click on a block to select it and the outer border is highlighted. Then click on the quilt to set the block.

The top toolbar has 2 Sketchbook buttons. "Add to Sketchbook" has a big red arrow pointing up and "View Sketchbook" has a pair of glasses. Be sure to locate them because they are used frequently.

Tip: if you want to know what a button is for, move the mouse cursor so it's on the button and hover there. Information about the button will appear in the status bar at the bottom of the window.

When you click the "View Sketchbook" button the Project Sketchbook window displays. You choose between viewing the following items:

  • Quilts
  • Blocks
  • Fabrics
  • Colors
  • Embroidery
  • Photos
  • Thread

The list is similar to the list of available libraries, except the sketchbook stores Quilts (i.e., designs) and the library has (quilt) Layouts ready to fill with blocks and fabrics to create a design.

To add fabrics to your quilt, click on one of the coloring tools in the right column. Choices are: Paintbrush, Spraycan, Swap All Colors and Eyedropper. The Paintbrush is the easiest to use

Clicking Paintbrush displays the default palette of fabrics that are always available to use. Use the scrollbar at the bottom of the fabric palette to scroll all the way to the end and find the fabrics you added to the sketchbook. Click on a fabric to select it; then click on a patch on the quilt design to set the fabric in the quilt.


So far, the EQ7 videos have covered basic concepts and functions of the software. All very simple, yet incredibly important to understanding how to design with the software.

I only did very simple designs in EQ6. I used a couple of blocks from the library or drew my own very simple block. I used the default palette of fabrics. I knew you could add more fabrics to the library, but I never took the time to figure out how to get more fabrics into my design!

These videos make adding more fabrics to your sketchbook so you can use them so clear. I added blocks to my EQ6 sketchbook. I don't know why it never occurred to me to add fabrics from the library to my sketchbook. I feel like a bit of a dunce.

Tuesday, June 01, 2010

Learning EQ7 - Part 1

Find a list of all the articles in this series on the Learning EQ7 Series page. The sidebar also has a link to the series page.


Video 1 - Learn Your Way Around EQ7

Duration: 4 minutes, 10 seconds

There are 3 worktables in EQ7.

  • quilt
  • block
  • images

Video 1 gives a thorough overview of how to switch between the 3 worktables and how to determine which worktable you are on. The images worktable is new in EQ7.

Video 2 - Where to Find Blocks, Fabrics and More

Duration: 2 minutes, 32 seconds

Like EQ6, EQ7 has 6 libraries of design items that you can use to create your quilt designs. The EQ7 libraries contain over 20,000 design elements.

Block Library
pieced and applique blocks and quilting designs.
Fabric Library
thousands of fabrics. You can scan your fabrics to create a custom library.
Layout Library
prebuilt quilt layouts for quilts of various sizes: king, twin, lap, crib, tablerunners and more. Or you can create your own custom layout.
Embroidery Library
images provided by companies that provide digitized embroidery images. The images allow you to see how the embroidery would look on your quilt, but you need to buy the embroidery designs from the company that created them.
Photo Library
photos you can use in your quilt
Thread Library
a variety of thread colors from major thread manufacturers. Use items from this library to color quilting stencils and embroidery designs in your quilt designs.

Video 2 was short and I spent time browsing through the libraries. There are lots of blocks and fabric. The fabric is sorted by category, color or manufacturer. You can choose which way you want to browse.

At this point, I started up EQ6 to see what fabrics it has. It looks very similar. Silly me. I never got beyond using the EQ6 Default Fabrics and there are so many more choices.

I had no idea the layout library existed in EQ6, but it's there. The EQ6 and 7 versions look very similar, but there are more layouts in the EQ7 layout library.

I briefly looked at the photo and thread libraries. I’m not sure I will use these. The EQ7 thread collections are very similar to the ones in EQ6. The images in the photo library seem very different from EQ6 and this is the smallest library.

Thursday, May 27, 2010

Learning EQ7 - Intro

Find a list of all the articles in this series on the Learning EQ7 Series page. The sidebar also has a link to the series page.


If you've read this blog this month, you know that I won a copy of Electric Quilt 7 in the EQ Blog contest. I've had EQ6 for a couple of years, but never spent time to learn how to use most of the features.

I will not let this wonderful gift from Electric Quilt sit on my computer barely used like EQ6. I will learn how to use the software. Not every single feature, but a significant portion.

I will report here on my journey in learning EQ7. Don't expect a specific schedule, but I'll try for something every week. This is a major time commitment, but it is something I want to do for myself and for you, my blog readers.

I have started viewing the EQ7 videos and will continue on to the lessons. I will watch all 10 of the videos. I will do many of the lessons, but will likely skip a couple of things. EQ7 does so much, I doubt anyone will use all of the features.

Monday, May 24, 2010

It's Here! It's Here!

Friday, I returned from an afternoon shopping trip to find a small white box on the front porch. UPS had delivered my Electric Quilt 7 software. I was surprised last Tuesday when I received an email saying it was being shipped. I hadn't expected to get EQ7 until near the official June release date. They really meant it when they said the blog contest winners would be among the first to get EQ7.

Front of EQ7 box

Here's the front of the box. The rectangles across the bottom of the keyboard say: "For Beginner Quilters", "For Advanced Quilters", and "For Photo Quilters." In other words, for almost every quilter who has a personal computer.

Back of EQ7 box

The back of the box shows complicated-looking designs that will either scare you away or convince you that you really should go through at least some of the lessons to learn how to do some of that stuff.

EQ7 software CD

Inside the box is the 272 page user manual. In the back of the user manual is the compact disc containing the software and the lessons you can read and learn from.

Flipping through the user manual, I discovered you can export metafiles of blocks and import the metafile in to Microsoft Word to create piecing diagrams. This is a wonderful tool for writing quilt patterns. I went back and checked EQ6 and guess what - it has the same capability. I really handicapped myself by never doing the EQ6 lessons.

Saturday afternoon, I installed the software. The only minor difficulty I had was it took 2 tries to activate the software. The first time I got a message about not being able to contact the EQ server. The second try worked fine, so the first attempt probably fell into an internet black hole.

I looked at the lists of lessons and videos and decided to watch the videos first, then start the lessons.

I plan to write a series of blog posts to document my journey through the EQ7 learning process, so check back to see how I'm doing and what I'm learning.

Saturday, May 15, 2010

And the EQ7 Winner Is:

Beth from San Diego, California. Her winning comment was:

Beth said...

I had a great time designing a Storm at Sea quilt on EQ5 - it was great to have the fabric and piece lists. Would love to be able to move up to EQ7!

I've exchanged email with Beth and have her address to send to The Electric Quilt Company, along with my address, so we both will get our Electric Quilt 7 software.

Thanks to The Electric Quilt Company for choosing me as one of the lucky winners in their blog contest so I could give away a copy of Electric Quilt 7.

Thank you to all who commented and left reasons why you'd like to win EQ7. There were entries from the United States, Canada, United Kingdom, France, Germany, Australia and Taiwan. And that's just what I could tell from the comments and email messages.

Those who entered included many who own a version of EQ and some who don't. Some are interested in the new features, some wanted to win for a friend or family member. You use or want to use Electric Quilt for a variety of reasons. To make designing easier. To design quilts for friends, family and charity and in a couple of cases (semi-)professionally.

For those who didn't win, remember that you can still pre-order EQ7 on the Electric Quilt website. There is a significant discount on orders placed before May 31, 2010.

The contest increased my blog readership significantly in the last week and a half. I hope some of you are interested in what I'm sharing here and keep coming back to visit.

Friday, May 14, 2010

Whirlygig Quilt - Finished Prototype

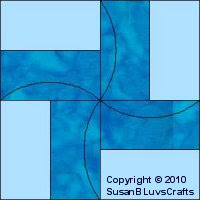
Whirlygig quilt

This quilt design was inspired by a quilt made in one of our Project Linus blanket groups. The block reminded me of a windmill or one of those little pinwheel / whirlygig toys on a stick. I couldn't find a name for the block and whirlygig is a fun name.

Whirlygig was my chapter's National Make a Blanket Day project on February 20. I made this top, with 8 inch blocks, as a prototype. I decided it was too much work/time for our Project Linus event. I changed to 10 inch blocks and used Electric Quilt 6 to help decide the number of blocks and border width.

Whirlygig quilt - closeup

I finished quilting the prototype yesterday. I quilted the ditches between all of the blocks, then quilted a curvy line through the center, both horizontally and vertically.

whirlygig quilt block - quilting detail

The closeup photo doesn't show the quilting well, so here's a sketch from EQ showing the curved quilting lines. The curved line gives a sense of the blades catching the wind and spinning.

Thursday, May 13, 2010

Last Day, Enter to Win EQ7

Electric Quilt 7

Don't forget, you have until 11:59 pm Central Daylight Time on Friday May 14, to enter my contest to win Electric Quilt 7. To enter, you must go to the post called Win Electric Quilt 7 and follow the instructions there.

If you need to convert May 14, 11:59 p.m. CDT to your local time, try the Time Zone Converter. Select America/Chicago for the 'From Time Zone.'

Friday, May 07, 2010

Wacky Rail Fence - Free Quilt Pattern

Wacky Rail Fence quilt

I added the Wacky Rail Fence quilt pattern to my website since last October, but never announced it here. It's a great way to use scrap fabric. My friend, Jeanine, taught this block in our old Quilts from Cornerstone group. I changed the dimensions a little and wrote my own directions. The picture above was drawn in Electric Quilt 6.

The quilt below was made by someone in one of our Project Linus blanket groups. I shared the pattern with my Project Linus volunteers last October and some were really excited about it.

Wacky Rail Fence quilt

If order your stacks of blocks in the same order you stacked the fabrics to cut them (based on the center fabric in each block), you can create an nifty secondary pattern. Turn the blocks with the cuts going up and down and then turn every other block 90 degrees. You get a wonky H that repeats a couple of times in each row, like in the drawing at the top of this post. Or you can mix everything up like the quilt above.

Now that I have more time to work on my own projects, I'm looking forward to making a Wacky Rail Fence quilt. I've got a stack of rectangles cut. All I have to do is find them.

Thursday, May 06, 2010

Win Electric Quilt 7

Electric Quilt 7

You've been waiting impatiently for my Electric Quilt 7 give away contest announcement. This is it.

Thank you to the Electric Quilt Company for choosing me to give away a copy of the EQ7 program on my blog and to receive a copy myself.

How to enter to win a copy of EQ7:

  1. Make a comment on this blog article telling me why you want to win EQ7. Do you design quilts as part of a business, for charity or just for you, your friends and family?
    • No anonymous comments. If you do not have a Google account or an OpenID, please use the Name/URL identity option. The URL can be left blank.
    • You may use a nickname or screen name instead of your full name in your comment.
  2. Send an email to complete your entry. Send the email to sb@handcraftingwithlove.net with the subject "HCWL EQ7 contest." Include enough information to match the email with your blog comment. The email will ensure that I can contact the winner.
  3. One entry per person.
  4. Entries will be accepted until Friday, May 14 at 11:59 pm Central Daylight Time.

A random number generator will be used to pick the winner.

The Electric Quilt 7 software program will be shipped directly to the winner by the Electric Quilt Company. The winner must provide full name, shipping address, phone number and email to receive the product. The Electric Quilt 7 release date is in June and the prize will not be shipped until then.

May 15, 2010 UPDATE - Comments and entries are closed.

Tuesday, May 04, 2010

I Won Electric Quilt 7!

Electric Quilt 7

I never win. Hardly ever.

I was stunned yesterday when I got the email that I was one of 10 winners in the EQ7 Blog contest. I didn't quite believe it. I was afraid to tell anyone, thinking it would turn out to be a mistake.

It's not a mistake. My "EQ7 is Coming!" post is listed in the contest winners on the Electric Quilt blog.

In addition to winning my own copy of EQ7, I get to give a copy to a blog reader. I will post my contest rules by the end of the week, so be sure to check back. I'll give you several days to enter, yet leave plenty of time to for you to order at the prerelease prices if you don't win.

In addition to The Electric Quilt Company, a thank you is due to Judy Laquidara and AT&T.

I thank AT&T for discontinuing the personal web page feature on their internet services. This forced me to find other web hosting, resulting in new email addresses.

Judy posted about the upcoming Electric Quilt 7 release, reminding me that I needed to update the email address on my EQ6 registration. Visiting the Electric Quilt website to do that, I also added the EQ blog to my RSS feed reader.

The contest was announced on the EQ blog the very next day. What a coincidence!

May 5, 2010 Update - IMPORTANT! Commenting on this post does not enter you in a drawing for EQ7. That will be another post later this week. Please check back.

Thursday, April 29, 2010

EQ7 is Coming!

Electric Quilt 7 is coming. All the EQ6 features will work the same way, plus lots of new goodies. They've added lots of help and 26 color lessons. There is a new Image Worktable so you can work on images right in EQ7. You can edit your fabric scans in EQ7 instead of having to use a separate program.

I confess, I've had EQ6 nearly 2 years and barely started the first lesson. With little effort, I learned enough to draw simple blocks and design quilts to make at our Project Linus Make a Blanket days. It's way faster than pencil and paper, so you can draft more versions of your design to help you make the final choice.

You can pre-order EQ7 now on the Electric Quilt website. There is a significant discount on orders placed before May 31, 2010. Software will be shipped in mid-June. If you've been thinking about buying Electric Quilt, now is the time. The pre-order price is the lowest you'll see for Electric Quilt.

Saturday, July 26, 2008

I Finally Did It

EQ6

Look what the mail carrier brought me today! EQ6. I'm probably the last quilter in the world to own EQ. I've planned to buy Electric Quilt ever since EQ6 was released a year and a half ago. I saved Amazon.com gift certificates until a $50 gift certificate on July 7 finally gave me enough to buy EQ6. So why did I wait another 2½ weeks to order?

Now I have to install the software and learn to use it. I think it's the learning part that made me put off buying the software. I tried to use Quilters Design Studio several years ago and never learned enough to use it well. I think I'm afraid that learning EQ will be too time consuming for my attention span.

I think I'll spend some time reading the manual before installing the software. Wish me luck.